Skip to Content
CFF Coolers
How to replace the internal light PCB

1
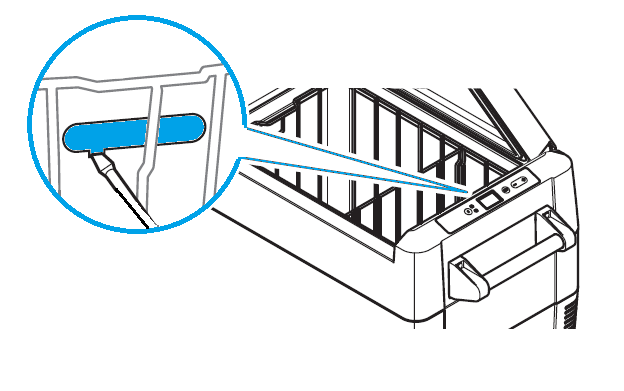
Disconnect the cooler from the power supply
2
Remove the transparent cover
Carefully pry out the transparent cover with a screwdriver or other similar tool.
3
Unscrew the PCB mounting screws

4
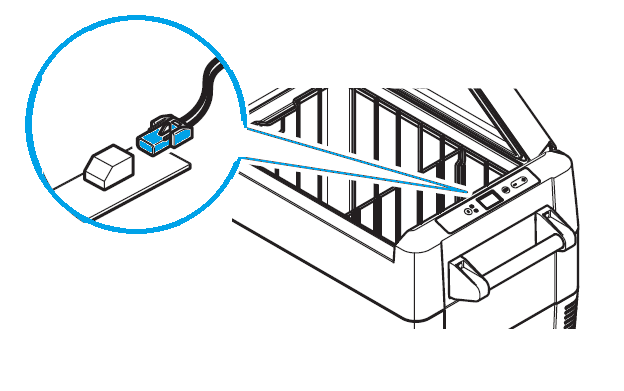
Pull out the plug from the PCB
5
Replace the defective light PCB
Fit the new PCB by reversing the removal instructions:
1
Connect the light PCB plug.
2
Screw the PCB mounting screws.
3
Press the transparent cover back into the housing.
6
Reconnect the cooler to the power supply